Salon Worthy DIY Pedicure
This post was sponsored by Amopé™ as part of an influencer activation for the #AmopeCrowd and Socialstars™.
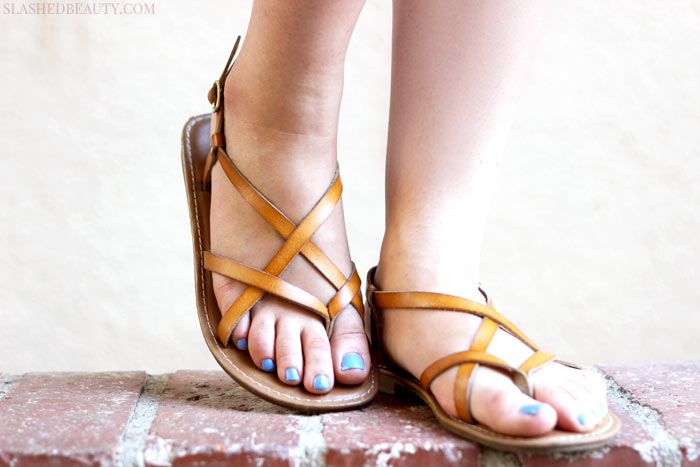
With the sun shining and our summer wardrobes making their first appearances of the season, taking care of your nails, cuticles and skin on your feet is just as crucial this season as it is with your hands. Especially when we’re exposing our feet to the summer elements in sandals often, we want to make sure they’re still date-ready when we want to slip on a pair of strappy heels and go out on the town. But, getting salon pedicures to maintain pretty and healthy feet can get expensive. I’ve pretty much completely stopped going to the nail salon altogether over the past couple years and do all of my mani/pedis at home. With a few key tools, you can do a salon worthy DIY pedicure from home.

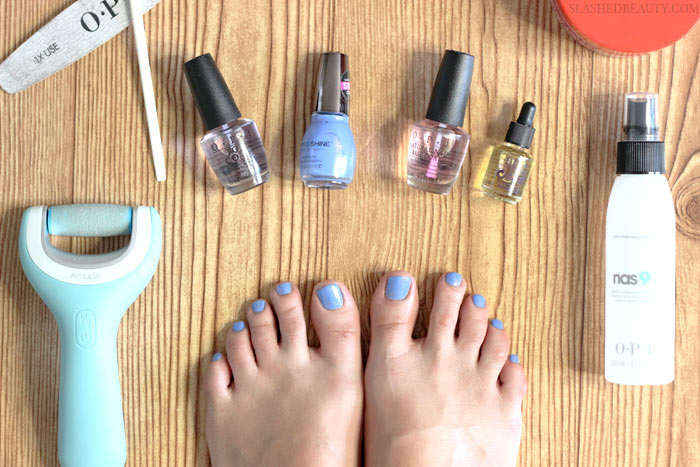
What You need:
- Foot File to buff away dry skin and calluses. This is my secret to getting soft, healthy feet that feel like they just left the salon. If you’re a true member of the Slashed Squad, you know that I use the Amopé™ Pedi Perfect Wet & Dry Rechargeable Foot File. It makes it easy to buff away hard and dead skin to reveal smooth soles in no time. Having feet free of cracks and hard patches is the key to a pedicure that looks and feels pro. You can use this new waterproof model on wet and dry skin, so either file away in the shower or after you’ve dried off.
- (Optional) Nail Clippers & Nail File to help trim and shape your toenails.
- Cuticle Oil to nourish the cuticles and skin around your toenails.
- Cuticle Stick to push back the cuticles and elongate the nail bed.
- Nail Cleanser or Acetone to clean the nail bed of debris and oils.
- Moisturizer for getting your feet to feel and look as smooth as ever. Since the skin on our feet is thick, use a rich moisturizer like a body butter to help soften the skin.
- Base Coat to protect the nail from staining.
- Nail Color to decorate your tootsies. 🙂
- Top Coat to prevent chipping.

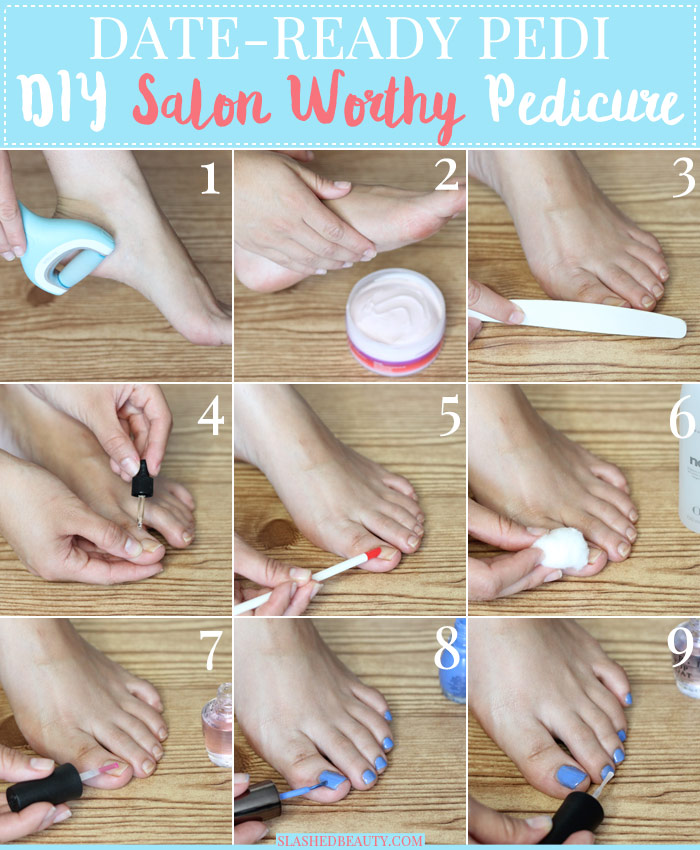
Steps:
- Use the Amopé™ Pedi Perfect on rough areas of the foot to reveal smooth skin.
- Apply a generous amount of moisturizer to help soften the skin.
- If you need to, use nail clippers and/or a nail file to shorten and shape the nails.
- Apply a drop of cuticle oil over each nail and rub into the cuticles and surrounding skin.
- Using a cuticle stick, or your thumb nail, push back gently on your cuticles (this is much healthier than clipping them)
- Clear away debris and remaining oil on the nail bed using a cleansing spray or acetone on a cotton ball. This is the best trick to getting an even and long-lasting polish application.
- Lay down a base coat to protect the nail from staining and give you a smooth foundation for color.
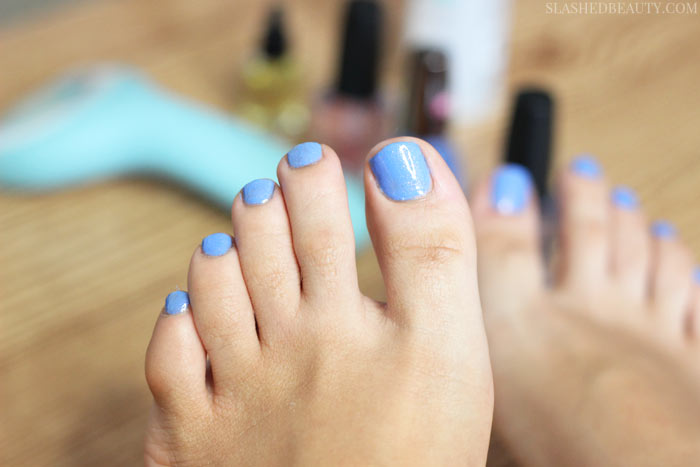
- Polish your toes with your favorite shade— however many coats needed to get the desired color.
- Finish off with a quick drying top coat.


Doing this DIY pedicure takes less time than sitting in the salon, and will save you a good chunk of change in the long run, too! Your feet will thank you for this salon-worthy treat and your feet will go from rough and weathered to date-ready in a flash. Between you and me, I only give myself a pedicure once every few weeks because this routine keeps my feet and toe nails looking fresh for a while. Just goes to show this little time investment in indulging yourself will pay off in more ways than one!
Check out the Amopé™ website for more tips on getting pretty, happy feet.
What are your best DIY pedicure tips?


Looks pretty easy, I’d love to give it a try!
Eu amei a dica de como a gente sair do salão manicure amei ❣️
Love the easy to follow tutorial
Love my Amope so much!
Your tootsies look great and that polish is so fresh and pretty. My pedi recommendation is to do Baby Foot every now and then to resurface and have baby soft feet. 😀
I never want to take the time to get a pedi but doing it at home like this would be great.
I wish I could still reach my feet! I do love a pedi, though – so relaxing, and I feel nekkid without polish on my toes.
I rarely get a pedi now that I have the Amope, saves me tons of money!
Your feet look amazing! Reminding me that I need a pedi!
Thank you for the easy to follow tutorial!
That is a beautiful color for a summer pedi!
I love the tutorial ! I do them almost all the time 🙂
Great pictorial! I’m in need of a pedi myself!
I look forward to trying Pedi Perfect, my poor feet could totally use some TLC this winter 🙂
I have that Pedi Perfect thing and love it!!
I wear open toes all year round pretty much. I need to “step up” my pedi game. Pun intended.
I wear sandals and flip flops every day… my feet get rough! I enjoy pampering my feet, but I usually let someone else do it 🙂 I can’t stand big box salons. I go to my friend who has her own salon in town.
I need to dust my pedi tools off and get my feet summer ready. They need some TLC.
Pampering is awesome! I used to have one of my besties come over and she would do my brows since she is an esthetician and I did pedis on her… it made a difference… I hate those days.
I agree! pamper the feet and take care of them…they tell a lot about the person!!!
I NEED the Pedi Perfect!
I always forget about the cuticle oil. And ugh my heels are so dry right now. I think you’ve hit on the perfect solution. #client
My heels get dry during winter, too! That’s the worsssst. One time my bf actually SENT me to the salon because my feet got so bad #guilty
I need a pedi! And a foot massage…
Here here!
Ahh, this sounds so relaxing right now. I really enjoy soaking my feet as part of the process – it softens skin but also just feels nice.
I agree, especially during winter. I don’t do it too often though, because it tends to dry out the skin when you overdo it.
This is inspiring me to do an at home pedi. The cold weather makes me a slacker!
What Eugenia said!!!! The Pedi Perfect sounds awesome!
I need this in my life right now! ALL OF IT!
That foot file looks awesome!
I definitely need a foot file.
An at home pedicure is one of my favorite ways to pamper and relax!
I think I need this foot file!
That Amope Pedi File looks identical to a Scholl pedi file available in Estonia and UK.
I saw a commercial for the Amore Pedi File, and now I want it
Love seeing how you do your pedi! I also love that electric foot file.