Basic Eyeshadow Application for Makeup Beginners Tutorial
One makeup technique that can be overwhelming to learn as a beginner: eyeshadow application. What colors do you use, where do you put them, how do you make them look cohesive? Luckily, there’s a pretty simple formula that you can use with most eyeshadow palettes to put together a basic look. Follow this easy eyeshadow tutorial for beginners to get started.

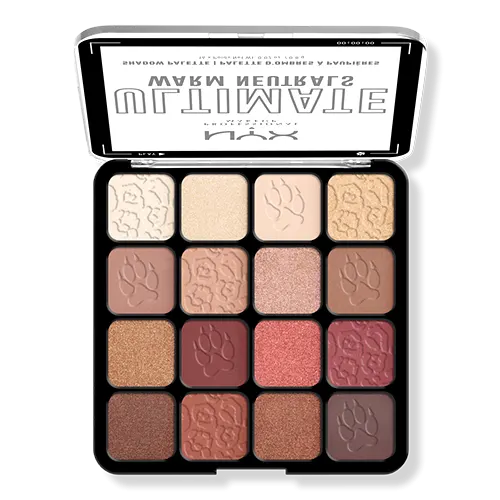
I’m using the NYX Ultimate Color Shadow Palette in Warm Neutrals ($20), which is a great eyeshadow palette for everyday wear and easy to navigate for beginners. The shadows you see on the tutorial correspond to this palette, but you can absolutely find similar shades in something you already own!

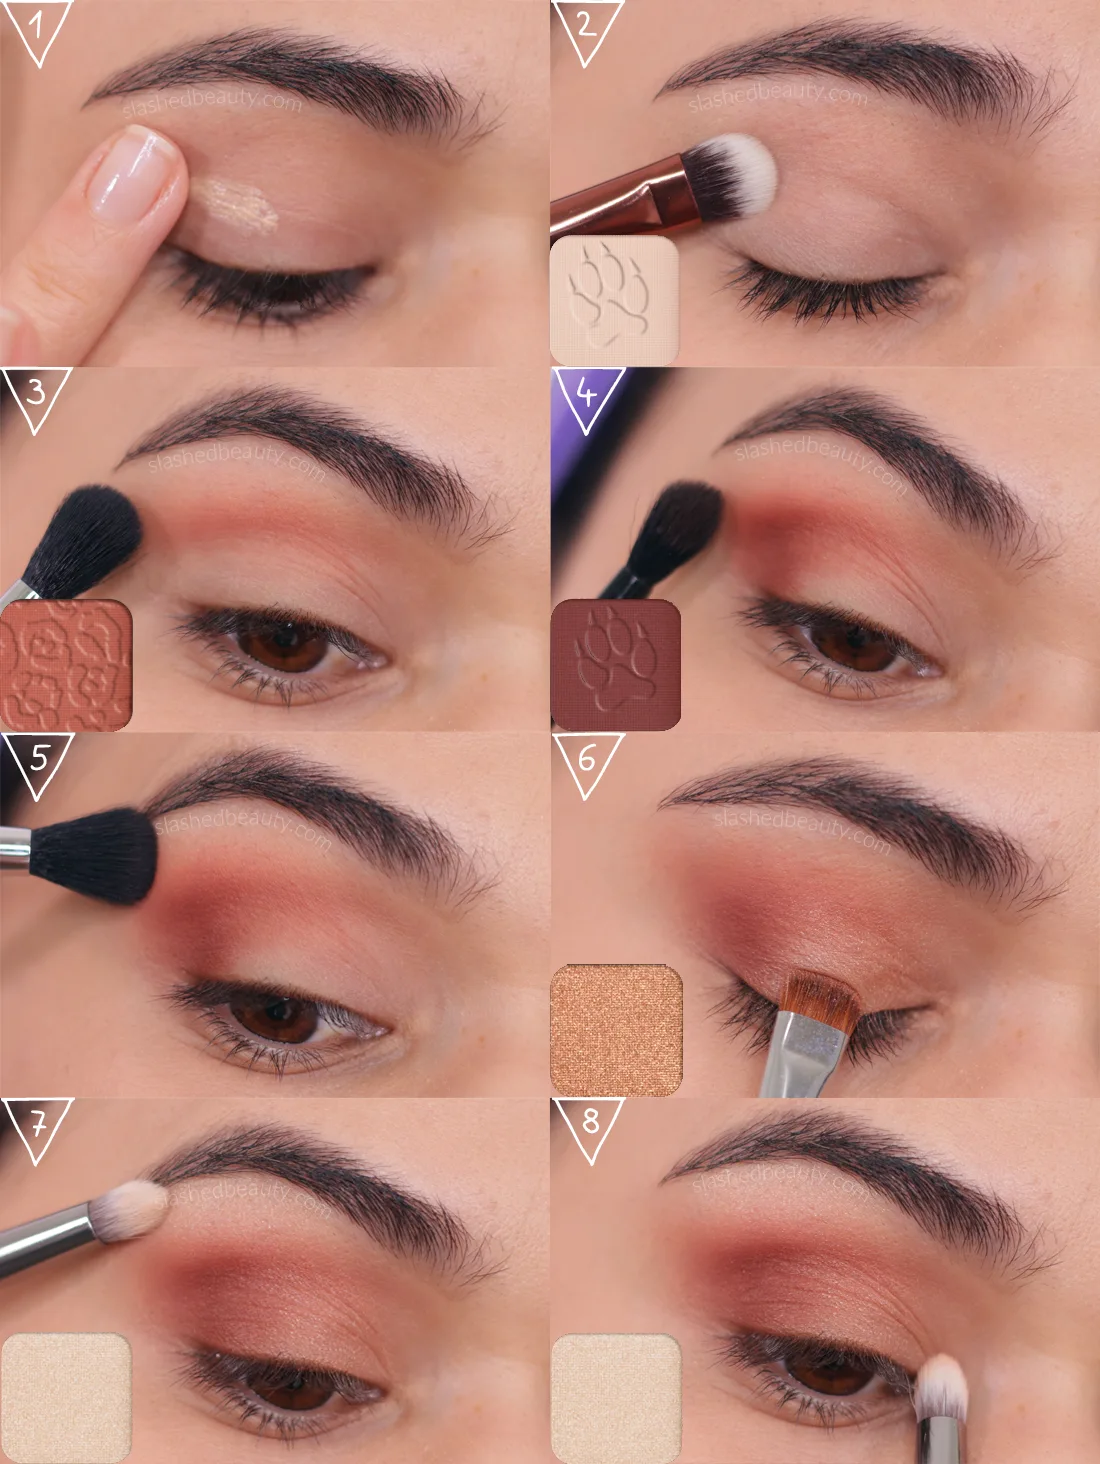
Basic Eyeshadow Application Technique:
- Blend an eyeshadow primer all over the lid. My favorite is the Milani Eyeshadow Primer. This helps your eyeshadow last longer and avoid creasing.
- Apply a base shade— a light neutral shade— all over the lid and up to the brow bone. This will set your primer and even out your eyelid tone. It will also help the rest of your shadows blend together more easily.
- Using a fluffy blending brush, apply a medium-toned shade above the crease of your eye, and blend softly upward to reduce harsh edges. This is called your transition shade. I prefer using a matte shade for this step.
- With a smaller crease blending brush, apply your darkest shade to the outer corner of your eye, sweeping into the crease.
- Blend the crease and transition shade together with the same brush from step 3 to create a smooth gradient between the two shades.
- Pat your lid shade on the center of your lid moving toward the inner corner. Have fun with this one— it’s the perfect spot for shimmer shades! If needed, blend the line where your lid and outer corner shades meet to create another smooth gradient.
- Highlight using a light shimmer shade on the brow bone.
- Pat the same highlight shade in your inner corner, and you’re done!

More Eyeshadow Tips:
- Blending is key. Make sure you’re using the right brushes and blend in soft, circular motions.
- Start light with the amount of shadow you apply. It’s harder to blend excess product, but you can always add more.
- Using matte (non-shimmer) shades for your transition and outer corner add more definition to the look.
- Paying attention to the tones of the shadow, you can replicate this look with any eyeshadow palette.
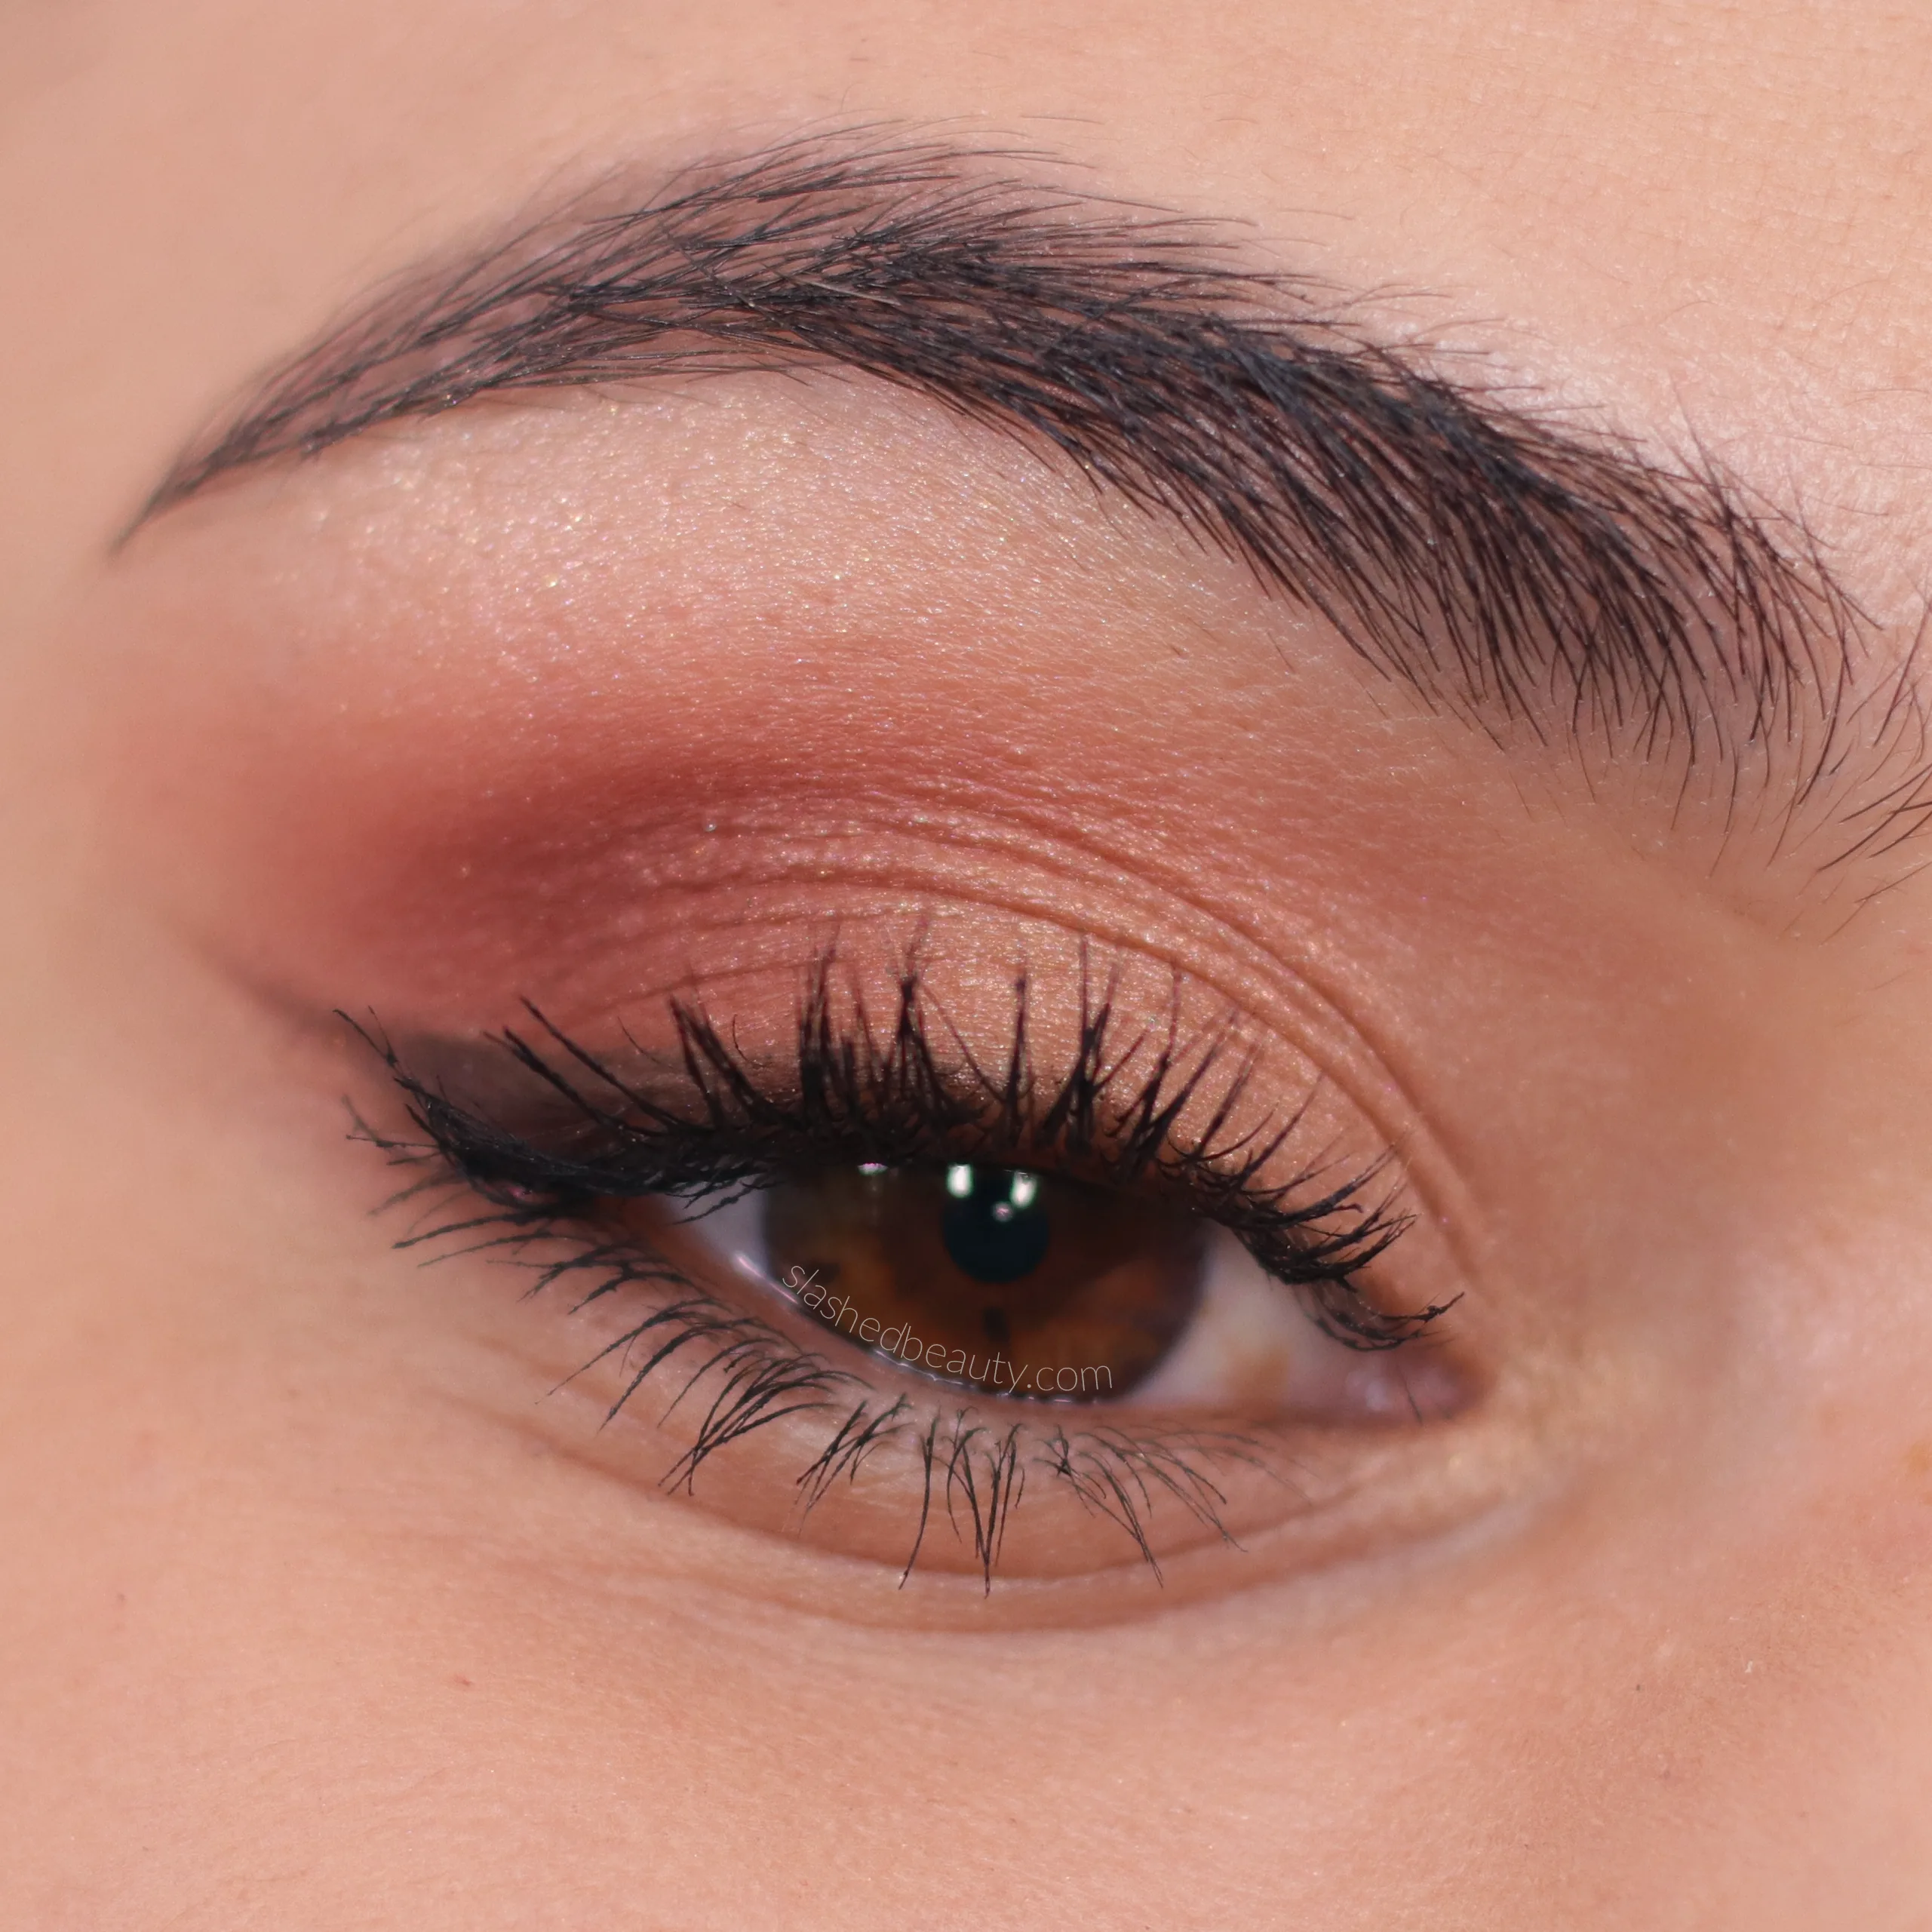
This is a great starting point for eyeshadow beginners, and will help you get used to shadow placement and blending before moving on to using more shades and other techniques.

HELLO !
First, I want to say thank you for this information, I am going to benefit well from it.
The simpler the directions the better. Do you have a tutorial for face makeup?
Contour, highlight cheeks and forehead, I would be very interested in learning that properly also!
I am a 67 year old woman and never taught how to apply make up the proper way. I’m happy I found this blog today and very greatful that I will now know the proper way to pit on my shadow.
Dottie W.Warwick R.I.
Is this with just a general crease brush or a blending crease brush?
Works so well with my new palette
Thanks so much for this tutorial! I’ve just discovered this beauty blog and I don’t think I will ever read another one that is as well written as this one! Very interesting and informative!
Thanks so much for this. It’s a great tutorial.
I tried this look and love it! I also love how your tutorial tells me which kind of brush to use too. Now if only I could apply eyeliner without ruining the whole look.
I have a winged liner tutorial here if you’d like: https://slashedbeauty.com/eyeliner-guide-makeup-beginners/
I clicked on the eyeshadow pallet link, but there are a bunch of different combinations. Can you tell me which on the model in the pictures is wearing please.
Warm Neutrals!
Hello I had a question and I’m not sure if this is the correct place to ask but here goes anyway. I look sick if I’m not wearing eyeliner so I used to live wearing it on the top and bottom but when I wear it on top it always smears to the top of my eyelids so my question is how do I keep that from happening? Thank you
I wonder if you might have hooded eyes then, this is very common! Using an eye primer beforehand should help with this, as well as waterproof formulas.
Wow glad to have found this post!!
it really was interesting and informative. you explained it in extraordinary way. Totally agreed with you on this.
Not just for beginners even old ladies like me need some help doing this look..Thank you for sharing this!
Thanks Judy! Hope it helps.
Thanks for this! I’ve been doing it wrong I thought the eyelids should be first to work on!
I find that this way gives me a better blend/gradient otherwise the darker crease shade can get overpowering!
Brilliant guide!! Well done.
This was great!!!!! I love that palette!
Great job on the tutorial! That’s one of my favorite palettes, as well.
That’s such a useful post! Love the look you created…
What a cute tutorial!
Such a beautiful, neutral look!
bookmarking this! Awesome tutorial!
lovely eyeshadow, and your tutorial was so easy to follow!
Great pictorial.