How to Create a Fake Wound for Halloween
Warning: This post contains images of fake wounds and blood.
With Halloween only a few short weeks away, I’m really getting in the mood by experimenting more with FX makeup. This year I think I’ll be working gore into my costume for the very first time, so I’ve been playing around to see what techniques are easy, fast, and spooky.
Learning how to create a fake wound for Halloween is a great basic skill because you can pretty much turn any character into a dead or zombie version with a few wounds and face powder. This particular technique is one that I’ve found easiest while still looking nice and creepy.
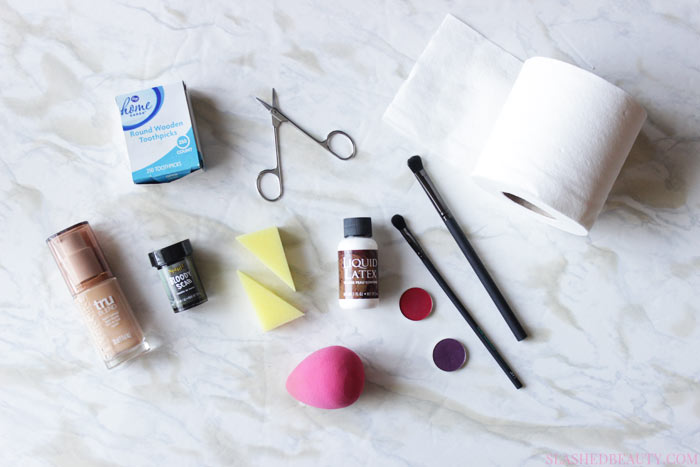
What You Need:

- Liquid Latex
- Blood Gel
- Toilet Paper
- Red and Purple Eyeshadow (I used Coastal Scents Hot Pots in Vibrant Red and Violetta)
- Foundation (I used CoverGirl truBlend Liquid Foundation)
- Disposable Makeup Wedges
- Beauty Blender
- Brow Scissors
- Toothpicks
- Eyeshadow Brushes
Steps:

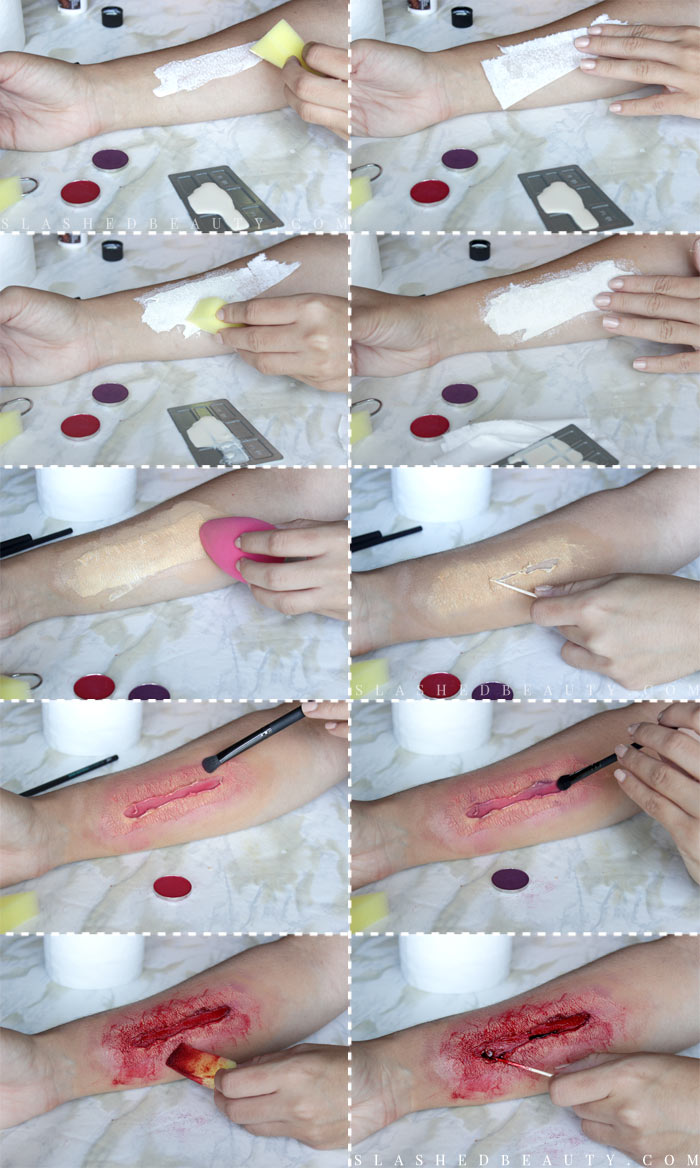
- Using a disposable sponge, start applying the liquid latex on your skin. Drag it to the length you want your wound, plus an extra inch on all sides.
- Before the first layer dries, tear off a piece of toilet paper about the length and width of the liquid latex smear and apply it on top. You can tear off any excess edges.
- Apply another layer of liquid latex over the entire piece of toilet tissue, with extra pressure on the edges to get it to lay flat.
- Repeat this process with another layer of toilet tissue. When applying your second piece of toilet tissue, make sure it is within the borders of the first layer. You don’t want to create thick edges— just a thick center. Finish with a final layer of liquid latex, and let dry completely.
- Take a foundation that matches the skin around the fake wound and apply on top of the tissue and surrounding areas with a beauty blender type sponge to get seamless coverage.
- Taking a toothpick or brow scissors, carefully pick a hole in the tissue/liquid latex layers down to your real skin. Be careful not to cut or scratch yourself— do this at your own risk and with supervision or adult assistance if necessary. After you achieve a hole, start picking and dragging through the latex in the direction you want your wound.
- Using a red eyeshadow, fill in the open space (your real skin) and blend lightly on surrounding areas.
- Taking a plummy purple shadow, focus this shade in the corners of the wound, right up against the latex edges. You can also blend this on surrounding areas for a bruising effect.
- Apply the fake blood on the inside of the fake wound, and tap on the skin around for a sore effect.
- Using a toothpick, Q-tip, or thin makeup brush, apply thick globs inside the fake wound up against the edges for a coagulated look.

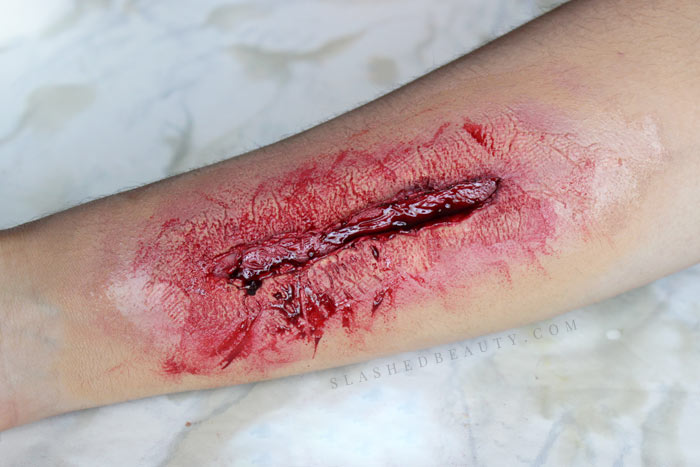
Gnarly! This technique can be used on the face as well, but I highly recommend patch-testing how your skin reacts to latex before applying. To take off the fake wound, I used dish soap and warm water and peeled the latex from the opening. It took about 5 minutes to get all of the latex off, and I highly suggest you shave the area before doing this process to make removal easier.
If you’re trying to throw together a last minute Halloween costume, adding a few of these on your arms and face could easily get you off the hook. Or, add it to a more elaborate costume to take it to the next level.
What costume would you add this fake wound to?


Great tutorial for someone who has always wondered how it was done